A Sewing Experiment
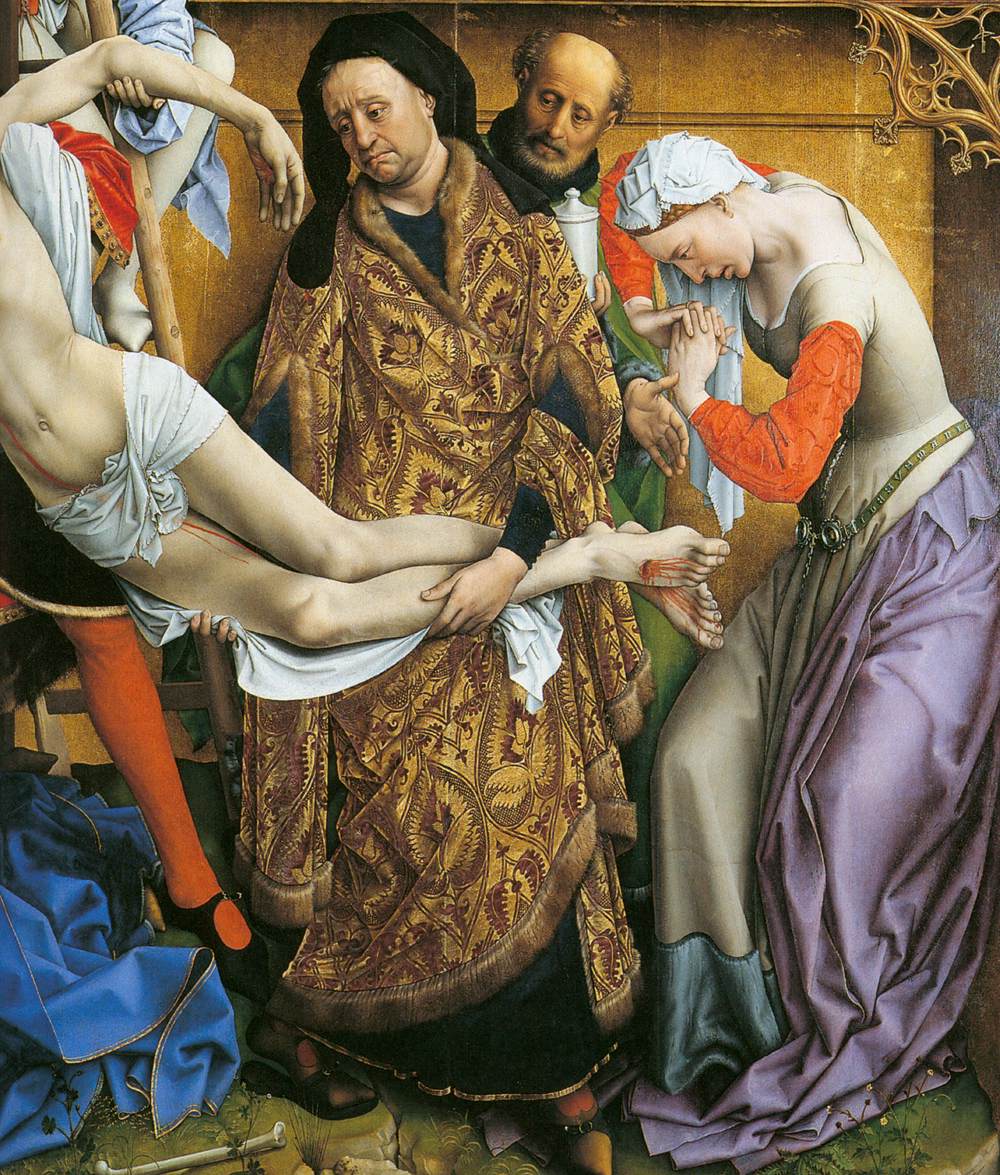
Jun. 9th, 2010 12:27 pmOne of the things I judged at Kingdom A&S this past weekend was a 15c Flemish outfit, including chemise, kirtle, and houppelande, which was very nice and not as complicated as I thought it might be. This is really the sort of thing that ![[livejournal.com profile]](https://www.dreamwidth.org/img/external/lj-userinfo.gif) adelavanbrugge should be wearing, so I thought I should start figuring out how to make it.
adelavanbrugge should be wearing, so I thought I should start figuring out how to make it.
One of the distinctive features of this style of kirtle (at least as depicted by Rogier van der Weyden) is the construction of the shoulders and neckline. There are diagonal seam lines on the bodice that indicate something like a raglan sleeve at the shoulder, even in instances where there is clearly a set in sleeve. That's a later issue to work on, though.
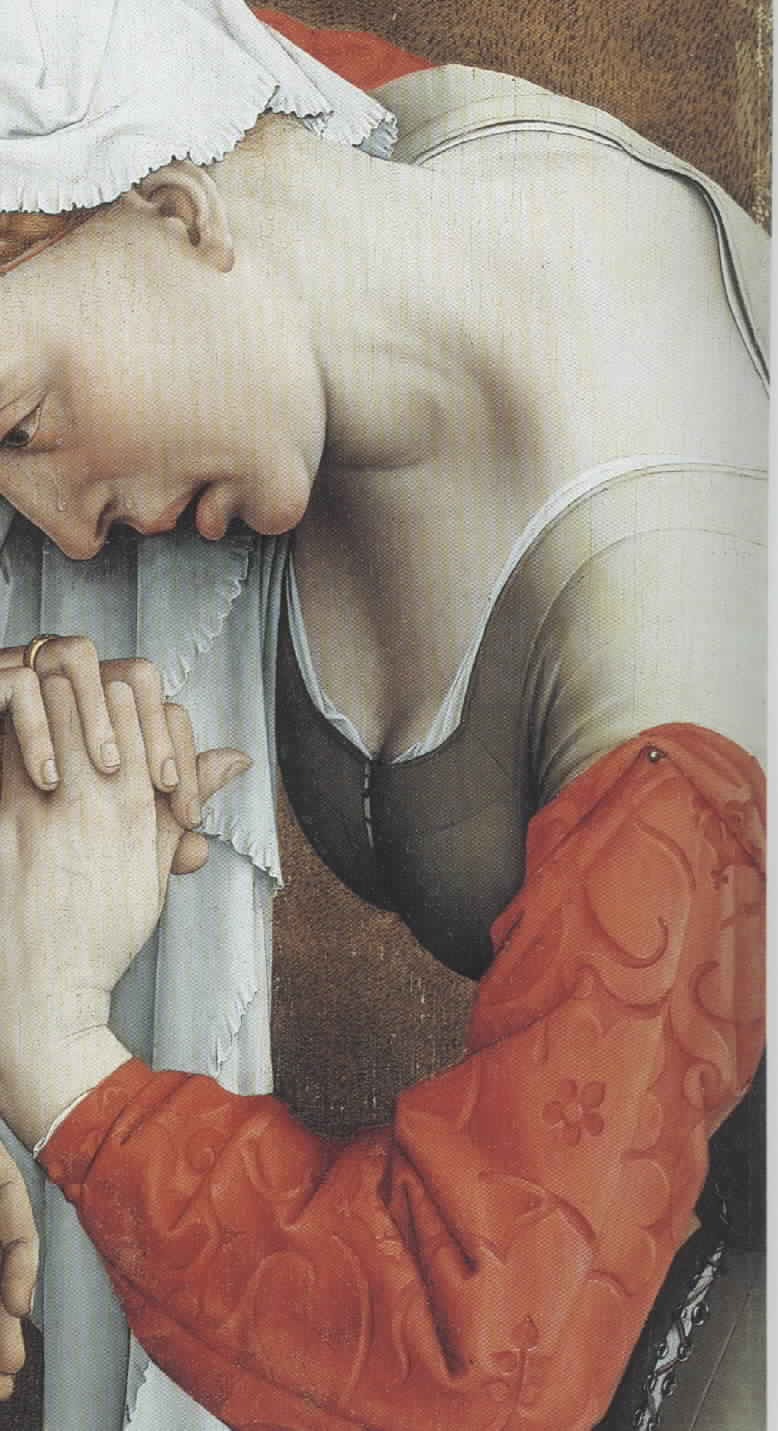
The other distinctive feature is a seam line parallel to the neckline of the bodice. You can see it quite clearly here and here. After discussing it withgwacie, whose knowledge of this style far exceeds my own, I decided that there were three possibilities for what was going on here:
1) A straight binding, either cut on the grain or on the bias.
2) A facing on the inside of the neckline, with the seam line being the stitches used to tack it down.
3) A reverse facing, sewn on the outside of the neckline.
My initial guess was that #2 was most likely, given the smooth surface at the seam line and the difficulty of managing a binding that wide around a curve. I decided to try all three options to see which gave the best effect.
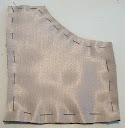
The most challenging part of any of these would be navigating the curve on the back of the neckline, so I made my test pieces with a similar curve. Each piece is made of three layers: two of heavy cotton to represent the interlining of the bodice and one of rayon satin.
 I sewed the binding on the front side of the test swatch, then pinned it around the edge. The result was so terrible that I didn't even bother to sew it down. There was no way it would be able to lay flat, and I don't think all the bias in the world would have made a difference.
 For the facing, I left some extra satin along the curved edge, so that I could sew the shaped facing to it and turn it to the inside. Even though cutting a curved facing produces some scrap, the size of the facing makes the waste negligible. I tacked the facing down with a stab stitch that went all the way through to the front. My stitches are not especially neat here, but even so they are small enough that they don't look like much except a dotted line.
 The reverse facing was cut in a similar fashion. I turned under the edge of the facing and attached it to the front with a whip stitch, then turned the other edge over the curve and sewed it down on the inside.
In the end I still think the facing turned out the best, but I'm glad I tested the theory.
EDITED TO ADD: Looking around some more turned up a higher quality scan of one of the images referenced above. It shows yet another seam line just inside the neckline edge, and the barest hint of what might be a fold or might be the seam of a set-in sleeve. The first bit is the most relevant, though, and brings up the question of whether there is a further narrow binding along the neckline edge or a line of stitching, perhaps to stabilize the edge?
One of the distinctive features of this style of kirtle (at least as depicted by Rogier van der Weyden) is the construction of the shoulders and neckline. There are diagonal seam lines on the bodice that indicate something like a raglan sleeve at the shoulder, even in instances where there is clearly a set in sleeve. That's a later issue to work on, though.
The other distinctive feature is a seam line parallel to the neckline of the bodice. You can see it quite clearly here and here. After discussing it with
1) A straight binding, either cut on the grain or on the bias.
2) A facing on the inside of the neckline, with the seam line being the stitches used to tack it down.
3) A reverse facing, sewn on the outside of the neckline.
My initial guess was that #2 was most likely, given the smooth surface at the seam line and the difficulty of managing a binding that wide around a curve. I decided to try all three options to see which gave the best effect.
The most challenging part of any of these would be navigating the curve on the back of the neckline, so I made my test pieces with a similar curve. Each piece is made of three layers: two of heavy cotton to represent the interlining of the bodice and one of rayon satin.
 I sewed the binding on the front side of the test swatch, then pinned it around the edge. The result was so terrible that I didn't even bother to sew it down. There was no way it would be able to lay flat, and I don't think all the bias in the world would have made a difference. For the facing, I left some extra satin along the curved edge, so that I could sew the shaped facing to it and turn it to the inside. Even though cutting a curved facing produces some scrap, the size of the facing makes the waste negligible. I tacked the facing down with a stab stitch that went all the way through to the front. My stitches are not especially neat here, but even so they are small enough that they don't look like much except a dotted line. The reverse facing was cut in a similar fashion. I turned under the edge of the facing and attached it to the front with a whip stitch, then turned the other edge over the curve and sewed it down on the inside.
In the end I still think the facing turned out the best, but I'm glad I tested the theory.
EDITED TO ADD: Looking around some more turned up a higher quality scan of one of the images referenced above. It shows yet another seam line just inside the neckline edge, and the barest hint of what might be a fold or might be the seam of a set-in sleeve. The first bit is the most relevant, though, and brings up the question of whether there is a further narrow binding along the neckline edge or a line of stitching, perhaps to stabilize the edge?
no subject
on 2010-06-09 05:08 pm (UTC)I think the reverse facing actually looks lovely, but I agree with you that the simple facing is the more likely choice, in part because a reverse facing adds to the decorative potential (use a scrap of contrasting color, for example), which I think we often under estimate, and we'd see more done decoratively were it a reverse.
no subject
on 2010-06-09 05:22 pm (UTC)no subject
on 2010-06-09 11:37 pm (UTC)no subject
on 2010-06-09 11:44 pm (UTC)I don't use the term Raglan as it is modern and tends to automatically make people think it must be wrong. Separate shoulders is how I describe it ;)
I use this technique pretty much exclusively for all my Dutch/German garb as it allows me to get the right shape and the right tension seen in portraits with those necklines that go right to the shoulder. Also a lot of the guarding around the necklines of these styles (16thC) are cut with a similar shape- there is nearly always a seam at the corner between neck and armscye. Sometimes they look mitred sometimes they look horizontal.
By the way, reverse facing segues nicely into guarding ;)
no subject
on 2010-06-09 05:19 pm (UTC)btw, "You can see it quite clearly here and here." - your first "here" links to a very tiny icon symbol, which I don't think is what you intended.
no subject
on 2010-06-09 05:22 pm (UTC)Flemish costume
on 2010-06-09 06:40 pm (UTC)Binding and shoulder construction on the A&S entry
on 2010-06-10 11:49 pm (UTC)As for the binding, I cut it on the straight of grain because of evidence I've seen for that in archaeological contexts. I think that with some further work on the fitting, I could make that work better due to the stretch in the wool blend. With thin wool I think that could be used to great advantage on the next kirtle I make. I found out working with a thin worsted for the houpelande that the amount of stretch even on straight of grain was quite noticeable.
The documentation definitely didn't address everything I wanted to discuss in patterning. I would like to add that I went with a shoulder seam due to the ambiguity in some of the paintings, (poses or hairstyles obscuring the shoulder area). It is equally obvious that in other van der Weyden paintings that a should seam is not apparent and the shoulder construction could be "raglan".
Regards,
Una
no subject
on 2015-03-27 11:21 pm (UTC)I believe that diagonal line from the armscye to the "corner" of the neckline is the actual shoulder seam.
If the bodice back is cut on the straight grain, extending the shoulder straps to the front would put them on the bias, allowing for more flexablity for range of movement. Imagine a Y.
I can't find it at the moment but there is an example of a corset done this way in one of Janet Arnold's books. And while her documentation is on something done a 100 years beyond 15c Flemish wear, there are certainly many other examples that support the skill of using bias to the advantage.
Hm. While thinking about this, I just thought of something. In our modern mindset, we tend to put shoulder seams on top. But why do they NEED to be there? If they are in front, as they are on Mary, one can reach and see to make adjustments to fit the garment, without the need for an additional person.